How to Create Branded Invoices in Salesforce Without Word Templates
Build a fully branded invoice template in Salesforce using drag-and-drop sections, dynamic merge fields, PDF generation, and automation with ZeroExport.
If your invoice process still depends on Word templates, small layout changes quickly become maintenance work.
In this tutorial, you will build a complete branded invoice directly inside Salesforce using ZeroExport. The full template is created with drag-and-drop sections, dynamic merge fields, and a repeatable structure your team can automate.
This is exactly the kind of workflow teams use when they want more maintainable document workflows and fewer template breakages.
Watch the full walkthrough video: How to create branded invoices in Salesforce.
What You Will Build
By the end, your invoice workflow will support:
- Create an invoice template using drag-and-drop sections
- Add dynamic merge fields for invoice numbers, dates, customer information, and line items
- Generate professional PDF invoices directly from Salesforce
- Automate invoice generation using Salesforce Flows and processes
Template Structure
Use this 5-part structure so invoices remain clear and reusable:
- Invoice Header
- Invoice Number
- Invoice Date
- Company Branding
- Company Information
- Company Logo
- Business Details
- Tax Information (GST/VAT/etc.)
- Billing Information
- Bill To
- Ship To
- Invoice Details
- Invoice Items
- Product/Service Name
- Quantity
- Unit Price
- Line Total
- Grand Total
- Terms & Conditions
- Payment Terms
Step-by-Step: Build the Invoice Template
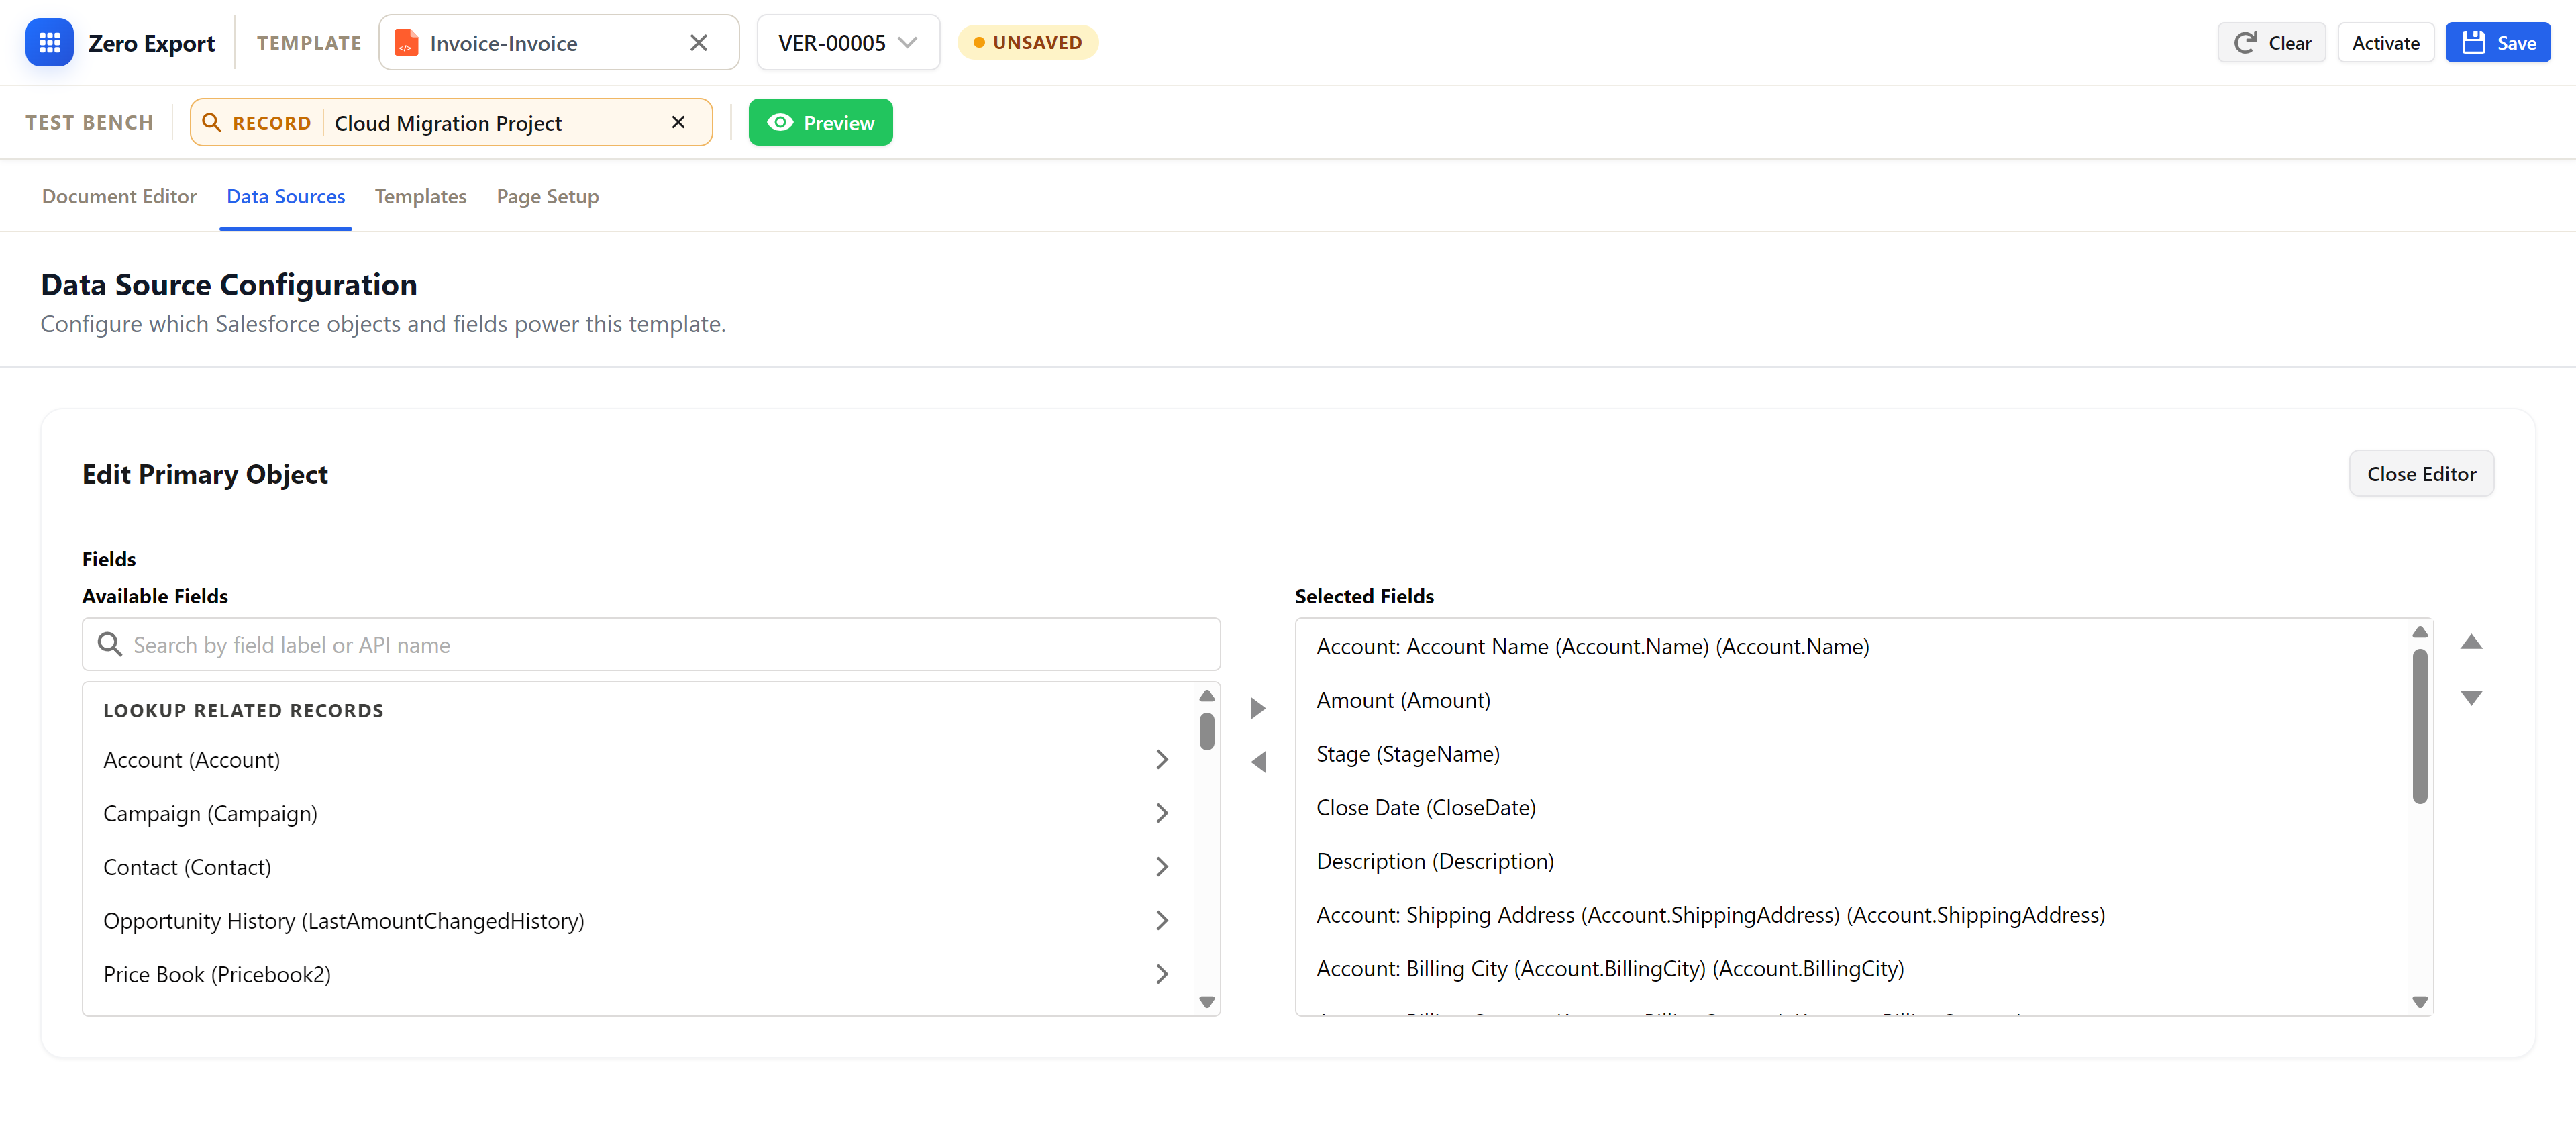
1. Select Opportunity Fields in Data Sources
Open the Data Sources tab in ZeroExport and configure the primary object fields from Opportunity first.
For this invoice template, include fields such as:
- Opportunity Amount
- Stage
- Close Date
- Account Name
- Account Billing and Shipping details
This ensures your header, billing block, and summary sections can render dynamic values correctly.
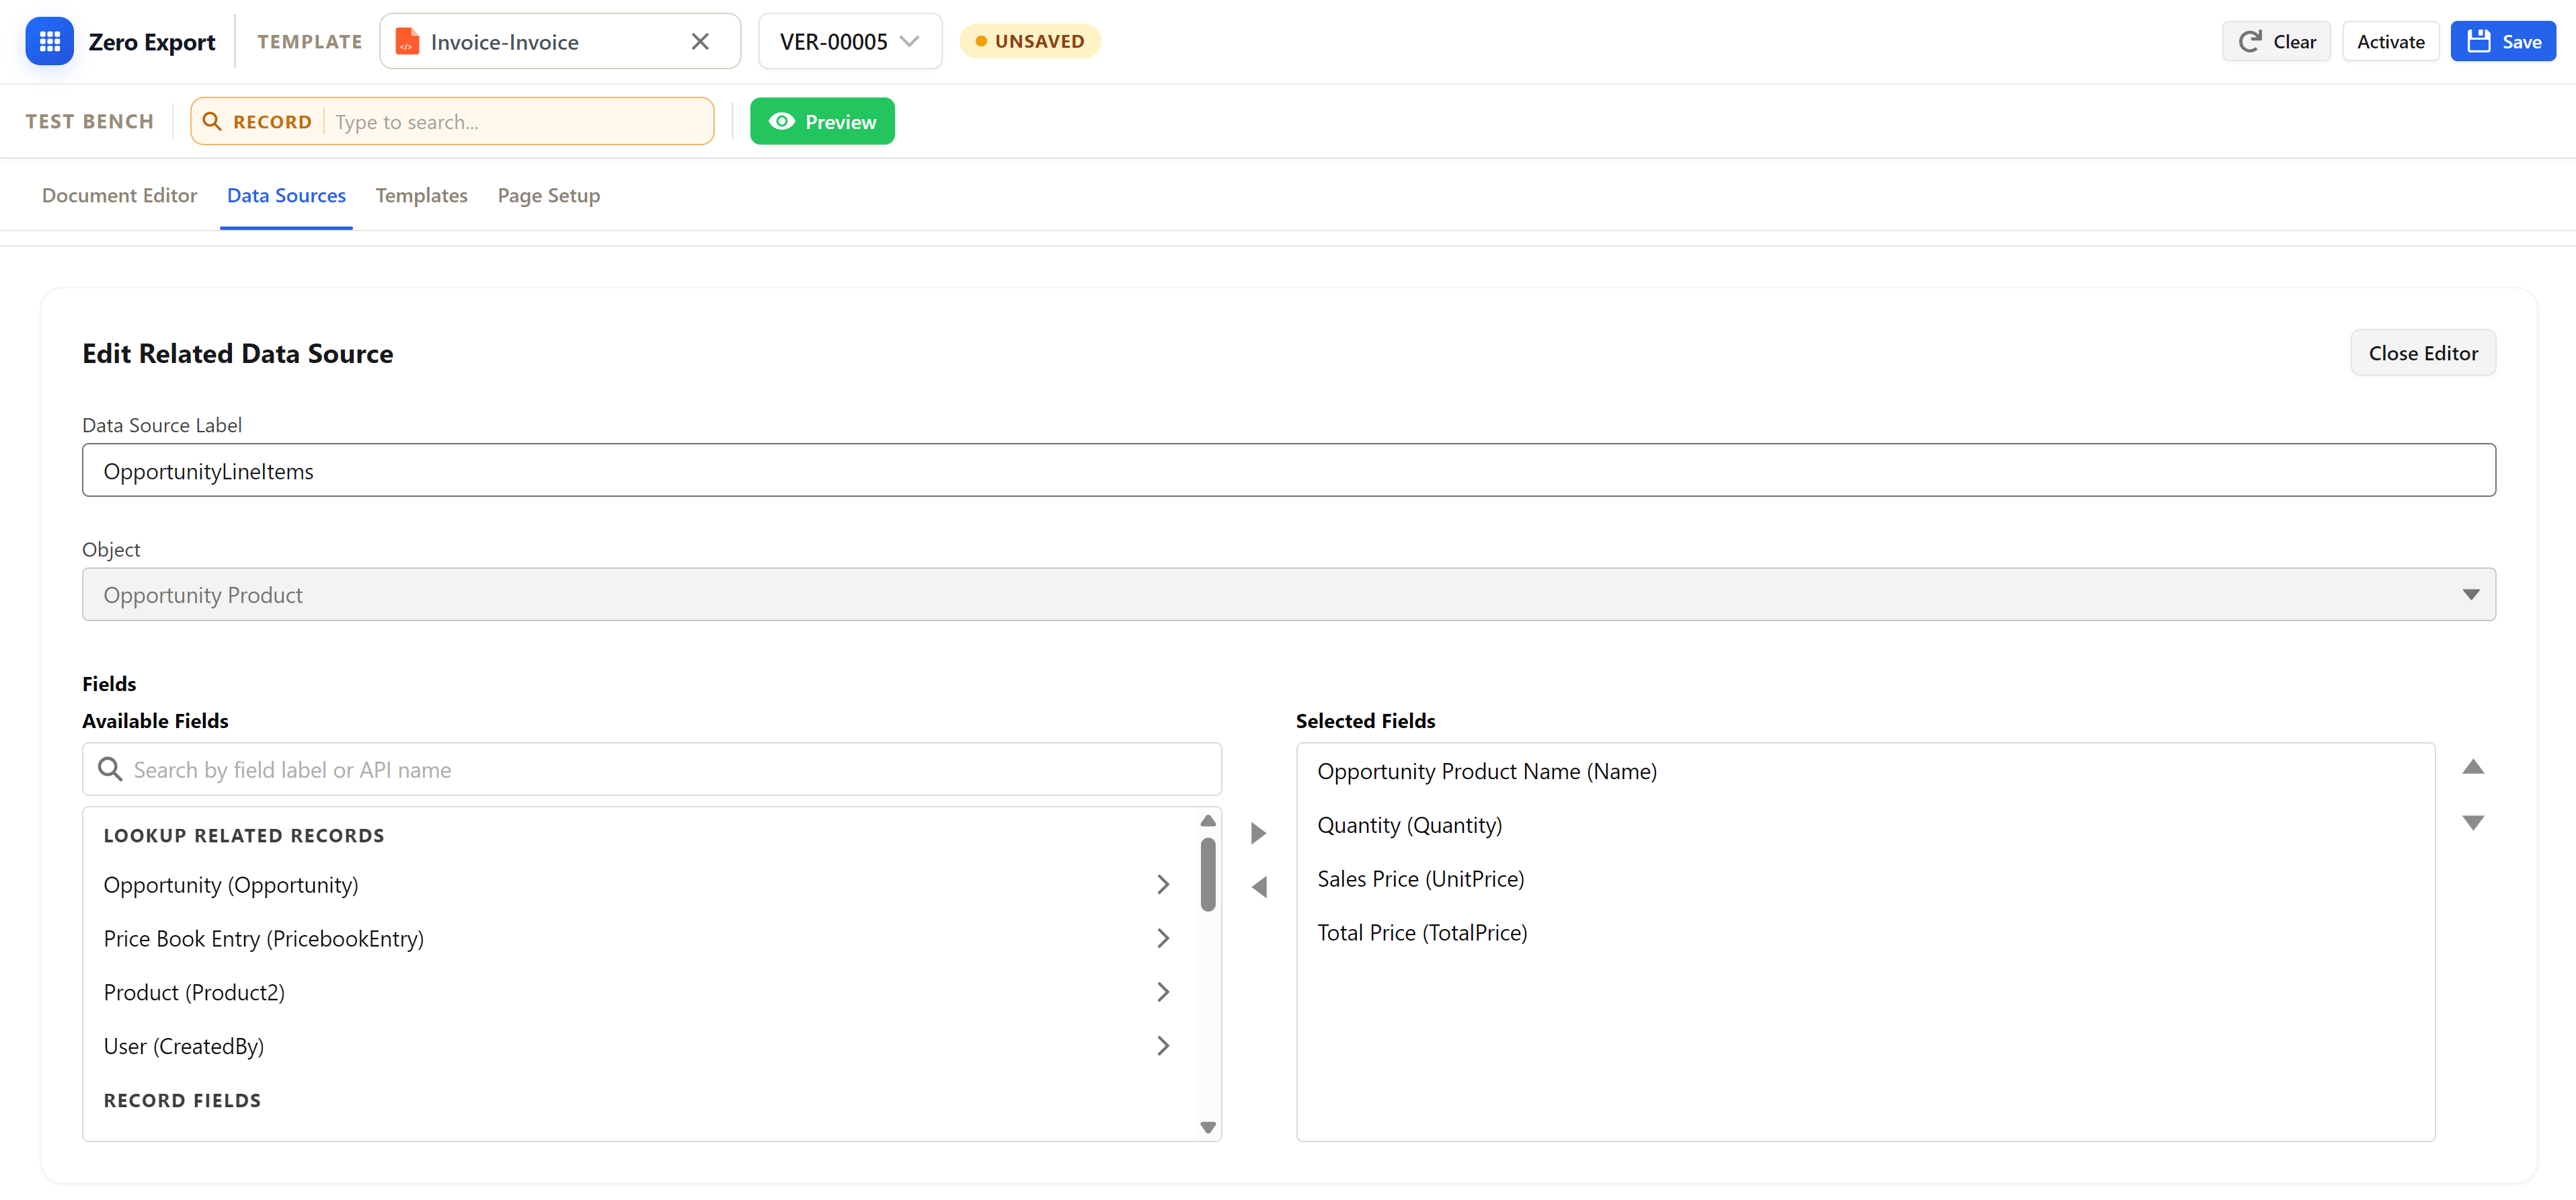
2. Select Opportunity Line Items in Data Sources
Next, add the related data source for OpportunityLineItems from the same Data Sources tab.
Select key fields for item-level rendering:
- Opportunity Product Name
- Quantity
- Sales Price (Unit Price)
- Total Price (Line Total)
These fields power the dynamic table rows in your invoice.
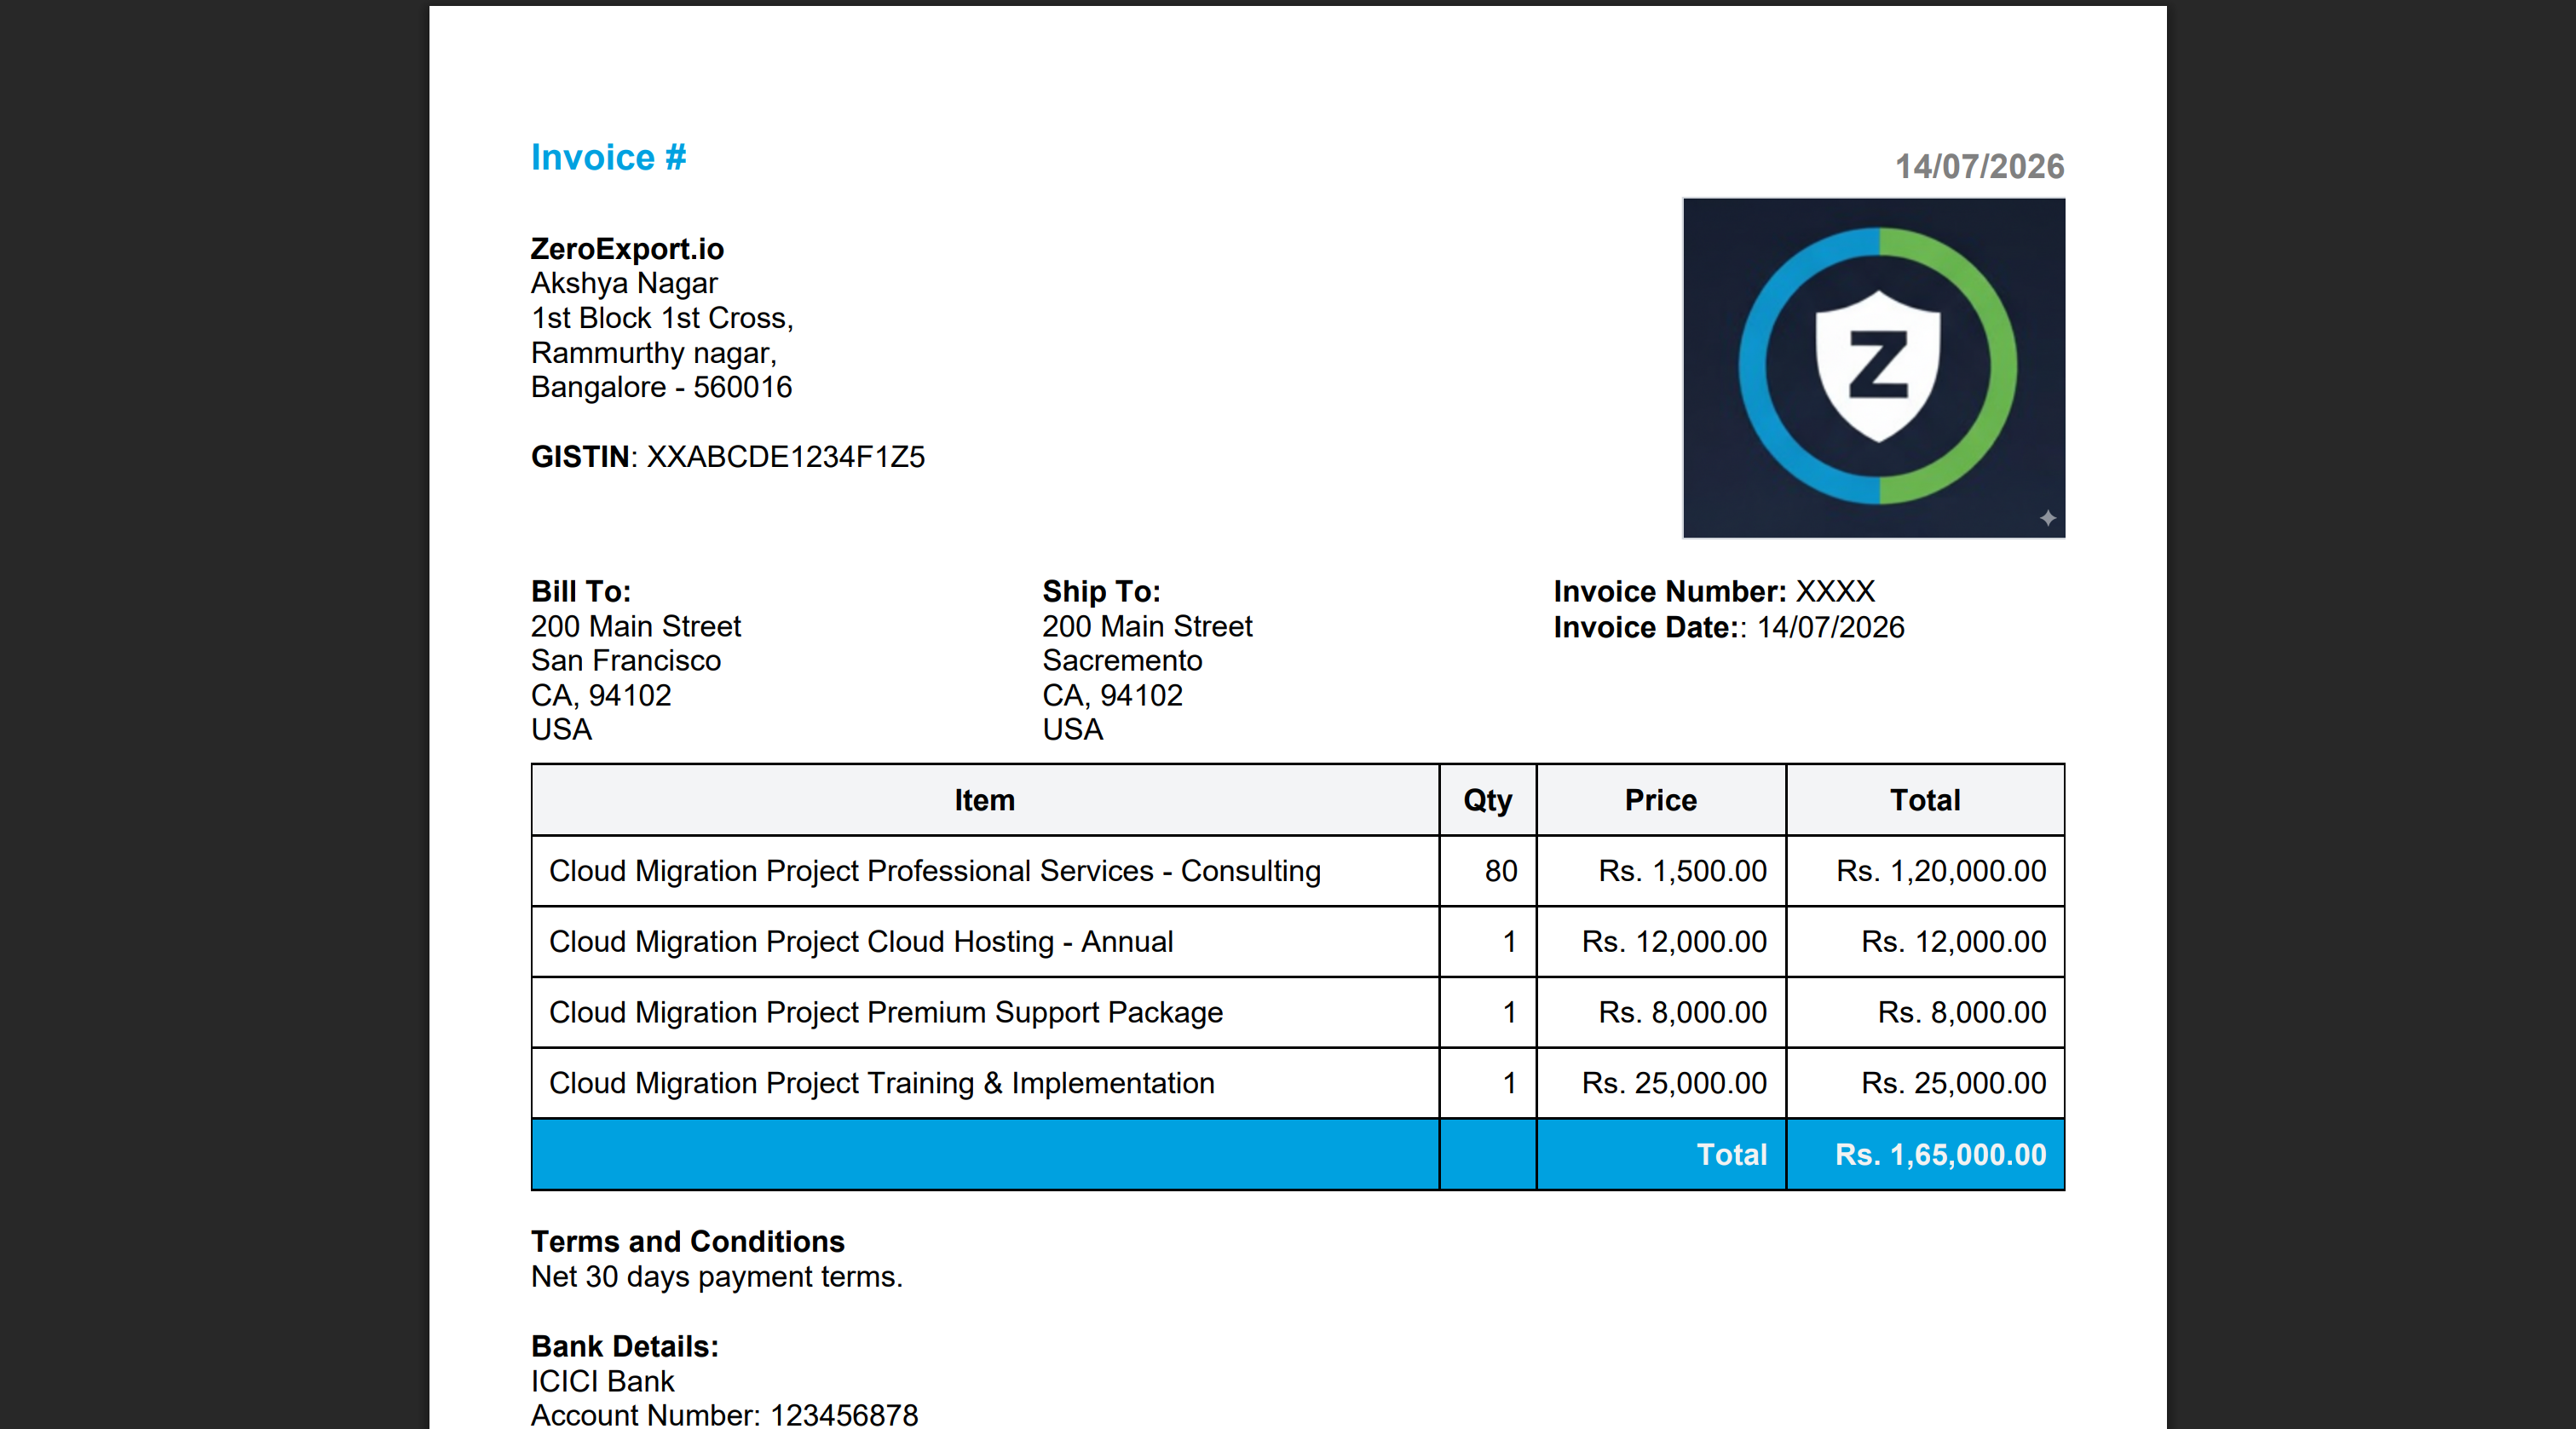
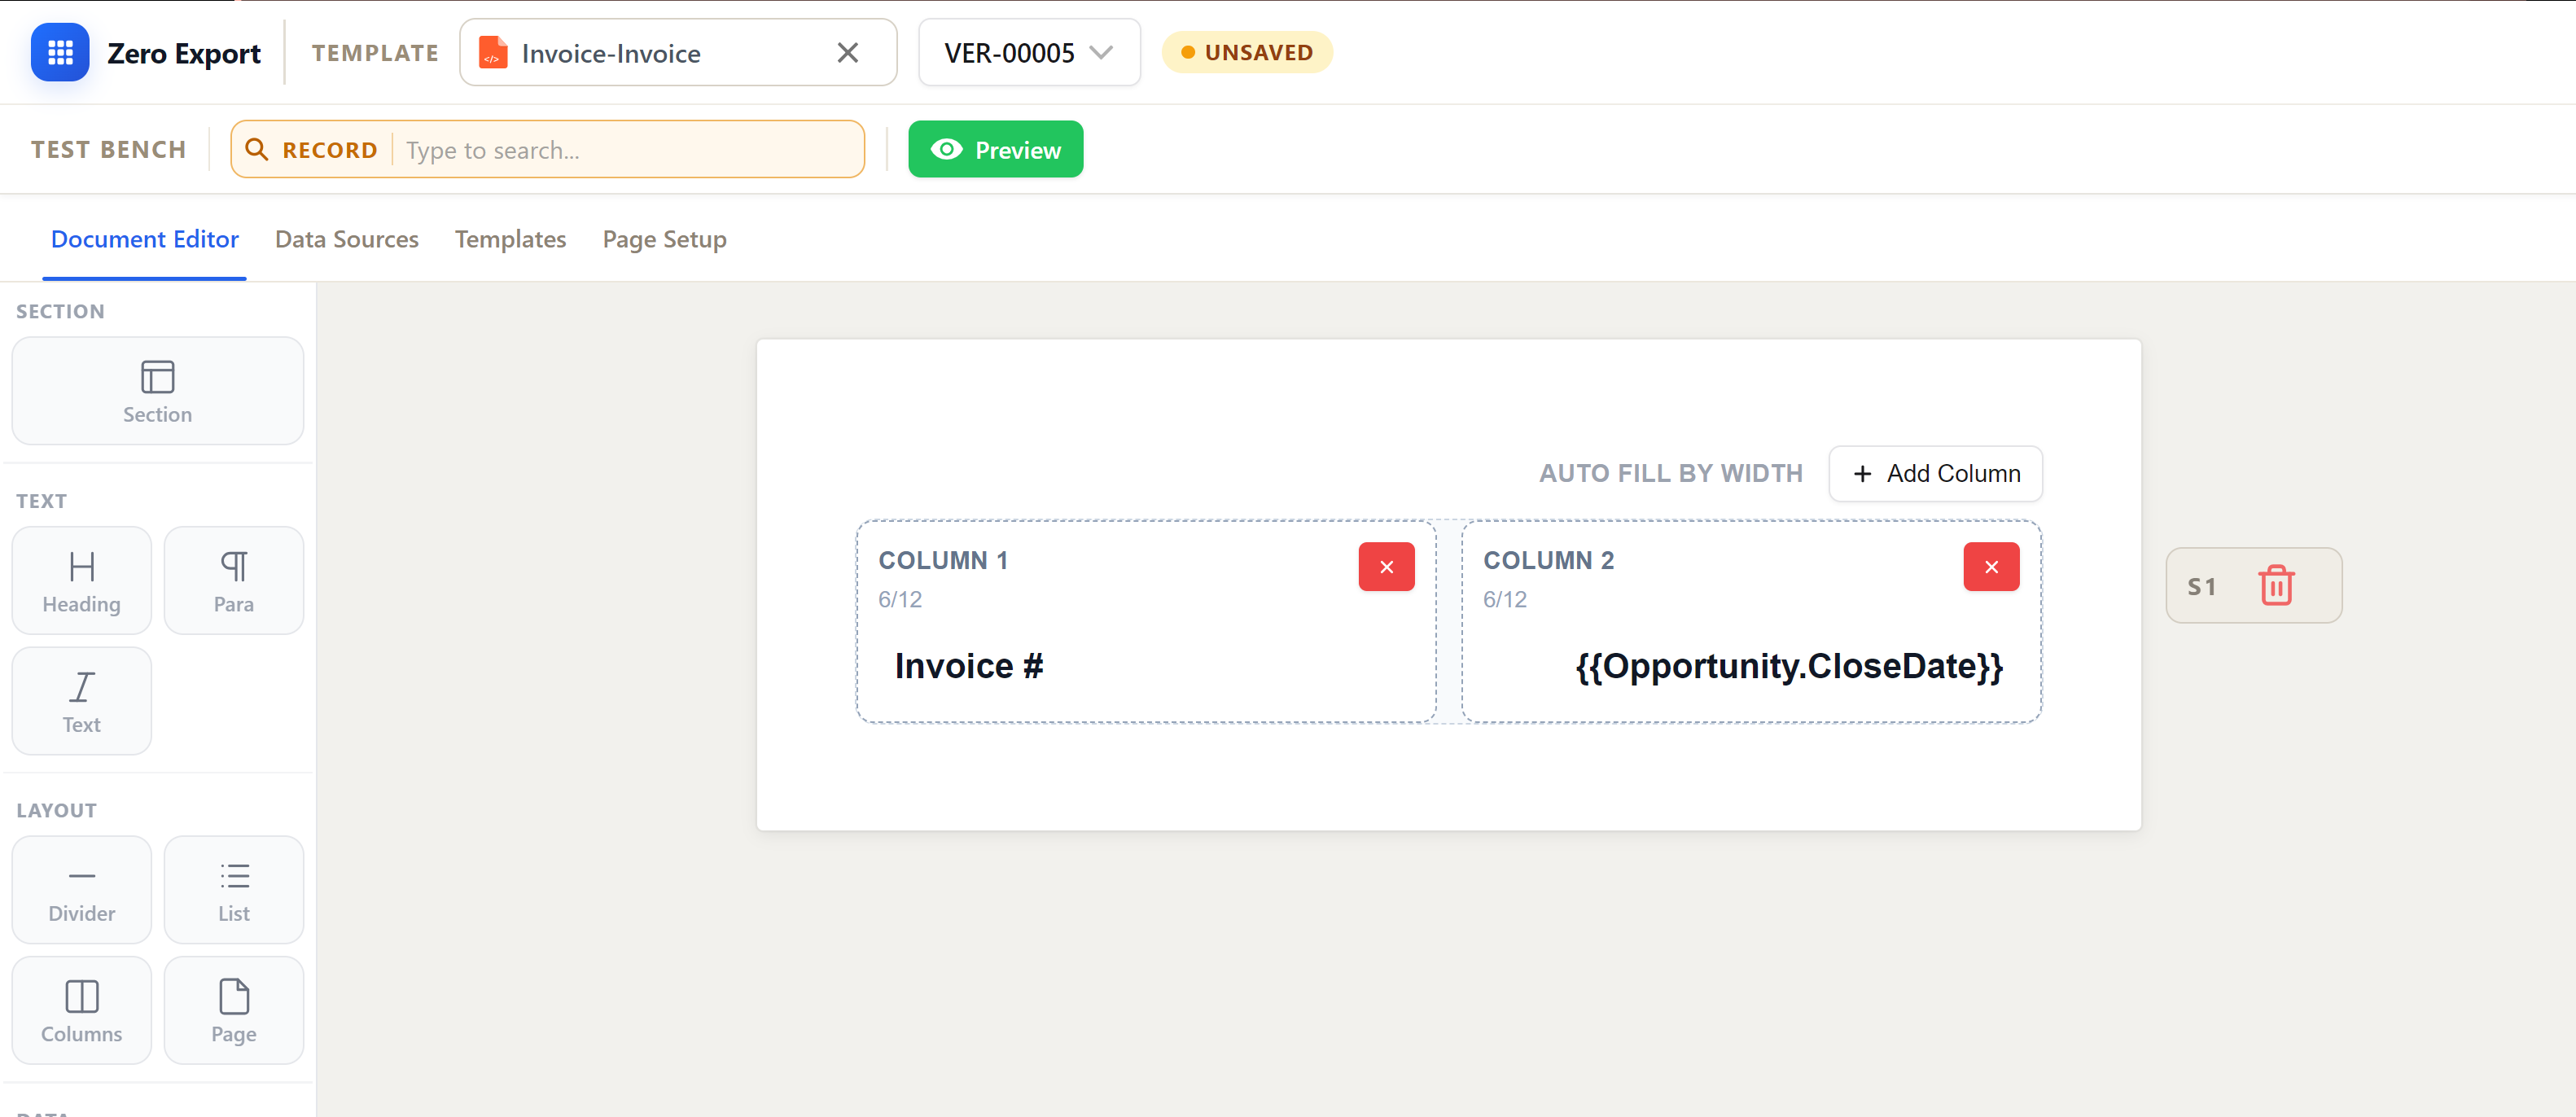
3. Add the Invoice Header Section
Start with a two-column row. In the first column, place the invoice title. In the second column, add dynamic fields for invoice number and invoice date.
In this demo flow, invoice data is sourced from the Opportunity object (including Opportunity Close Date) for fast testing.
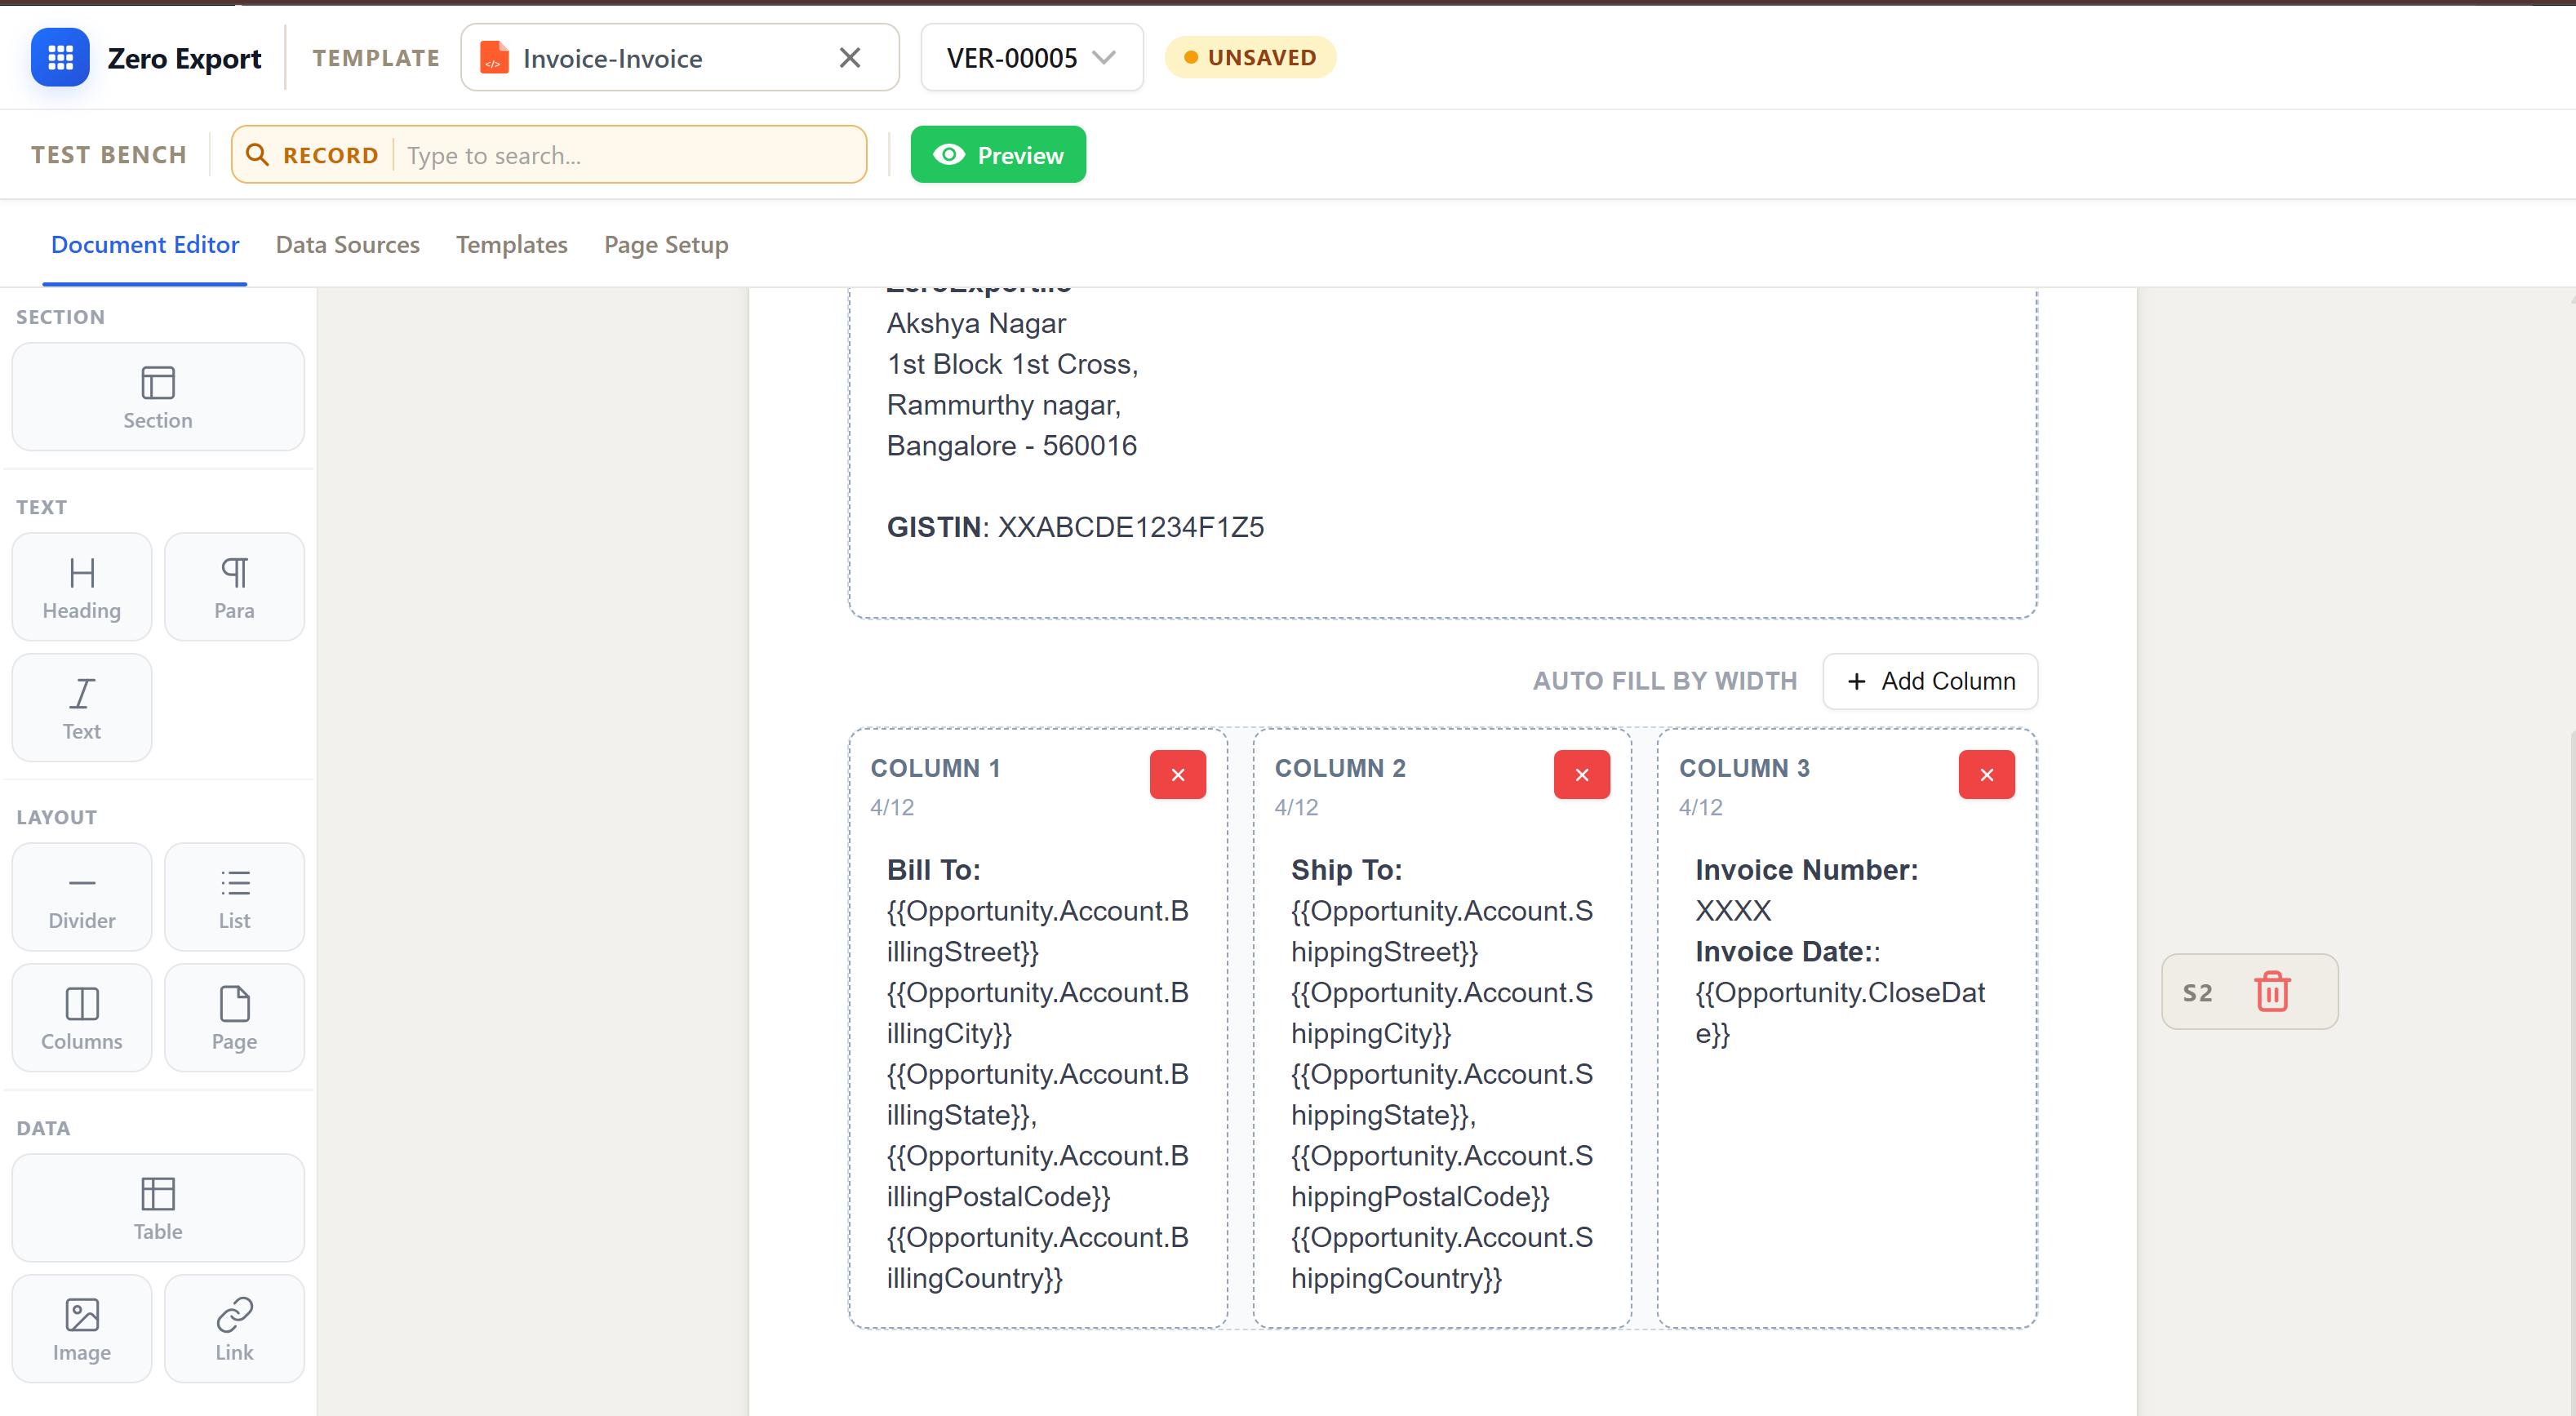
4. Add Company Information and Logo
Insert another grid section and split it into two columns. Keep company details and tax details (GST/VAT) on the left, and place the company logo on the right.
ZeroExport lets you adjust column widths from the right panel, so you can align business details and branding exactly how you want.
![]()
5. Add Billing and Shipping Details
Create a dedicated billing block with:
- Bill To address
- Ship To address
- Invoice Number
- Invoice Date
Bind each element using merge fields so customer and invoice information is rendered dynamically from the selected Salesforce record.
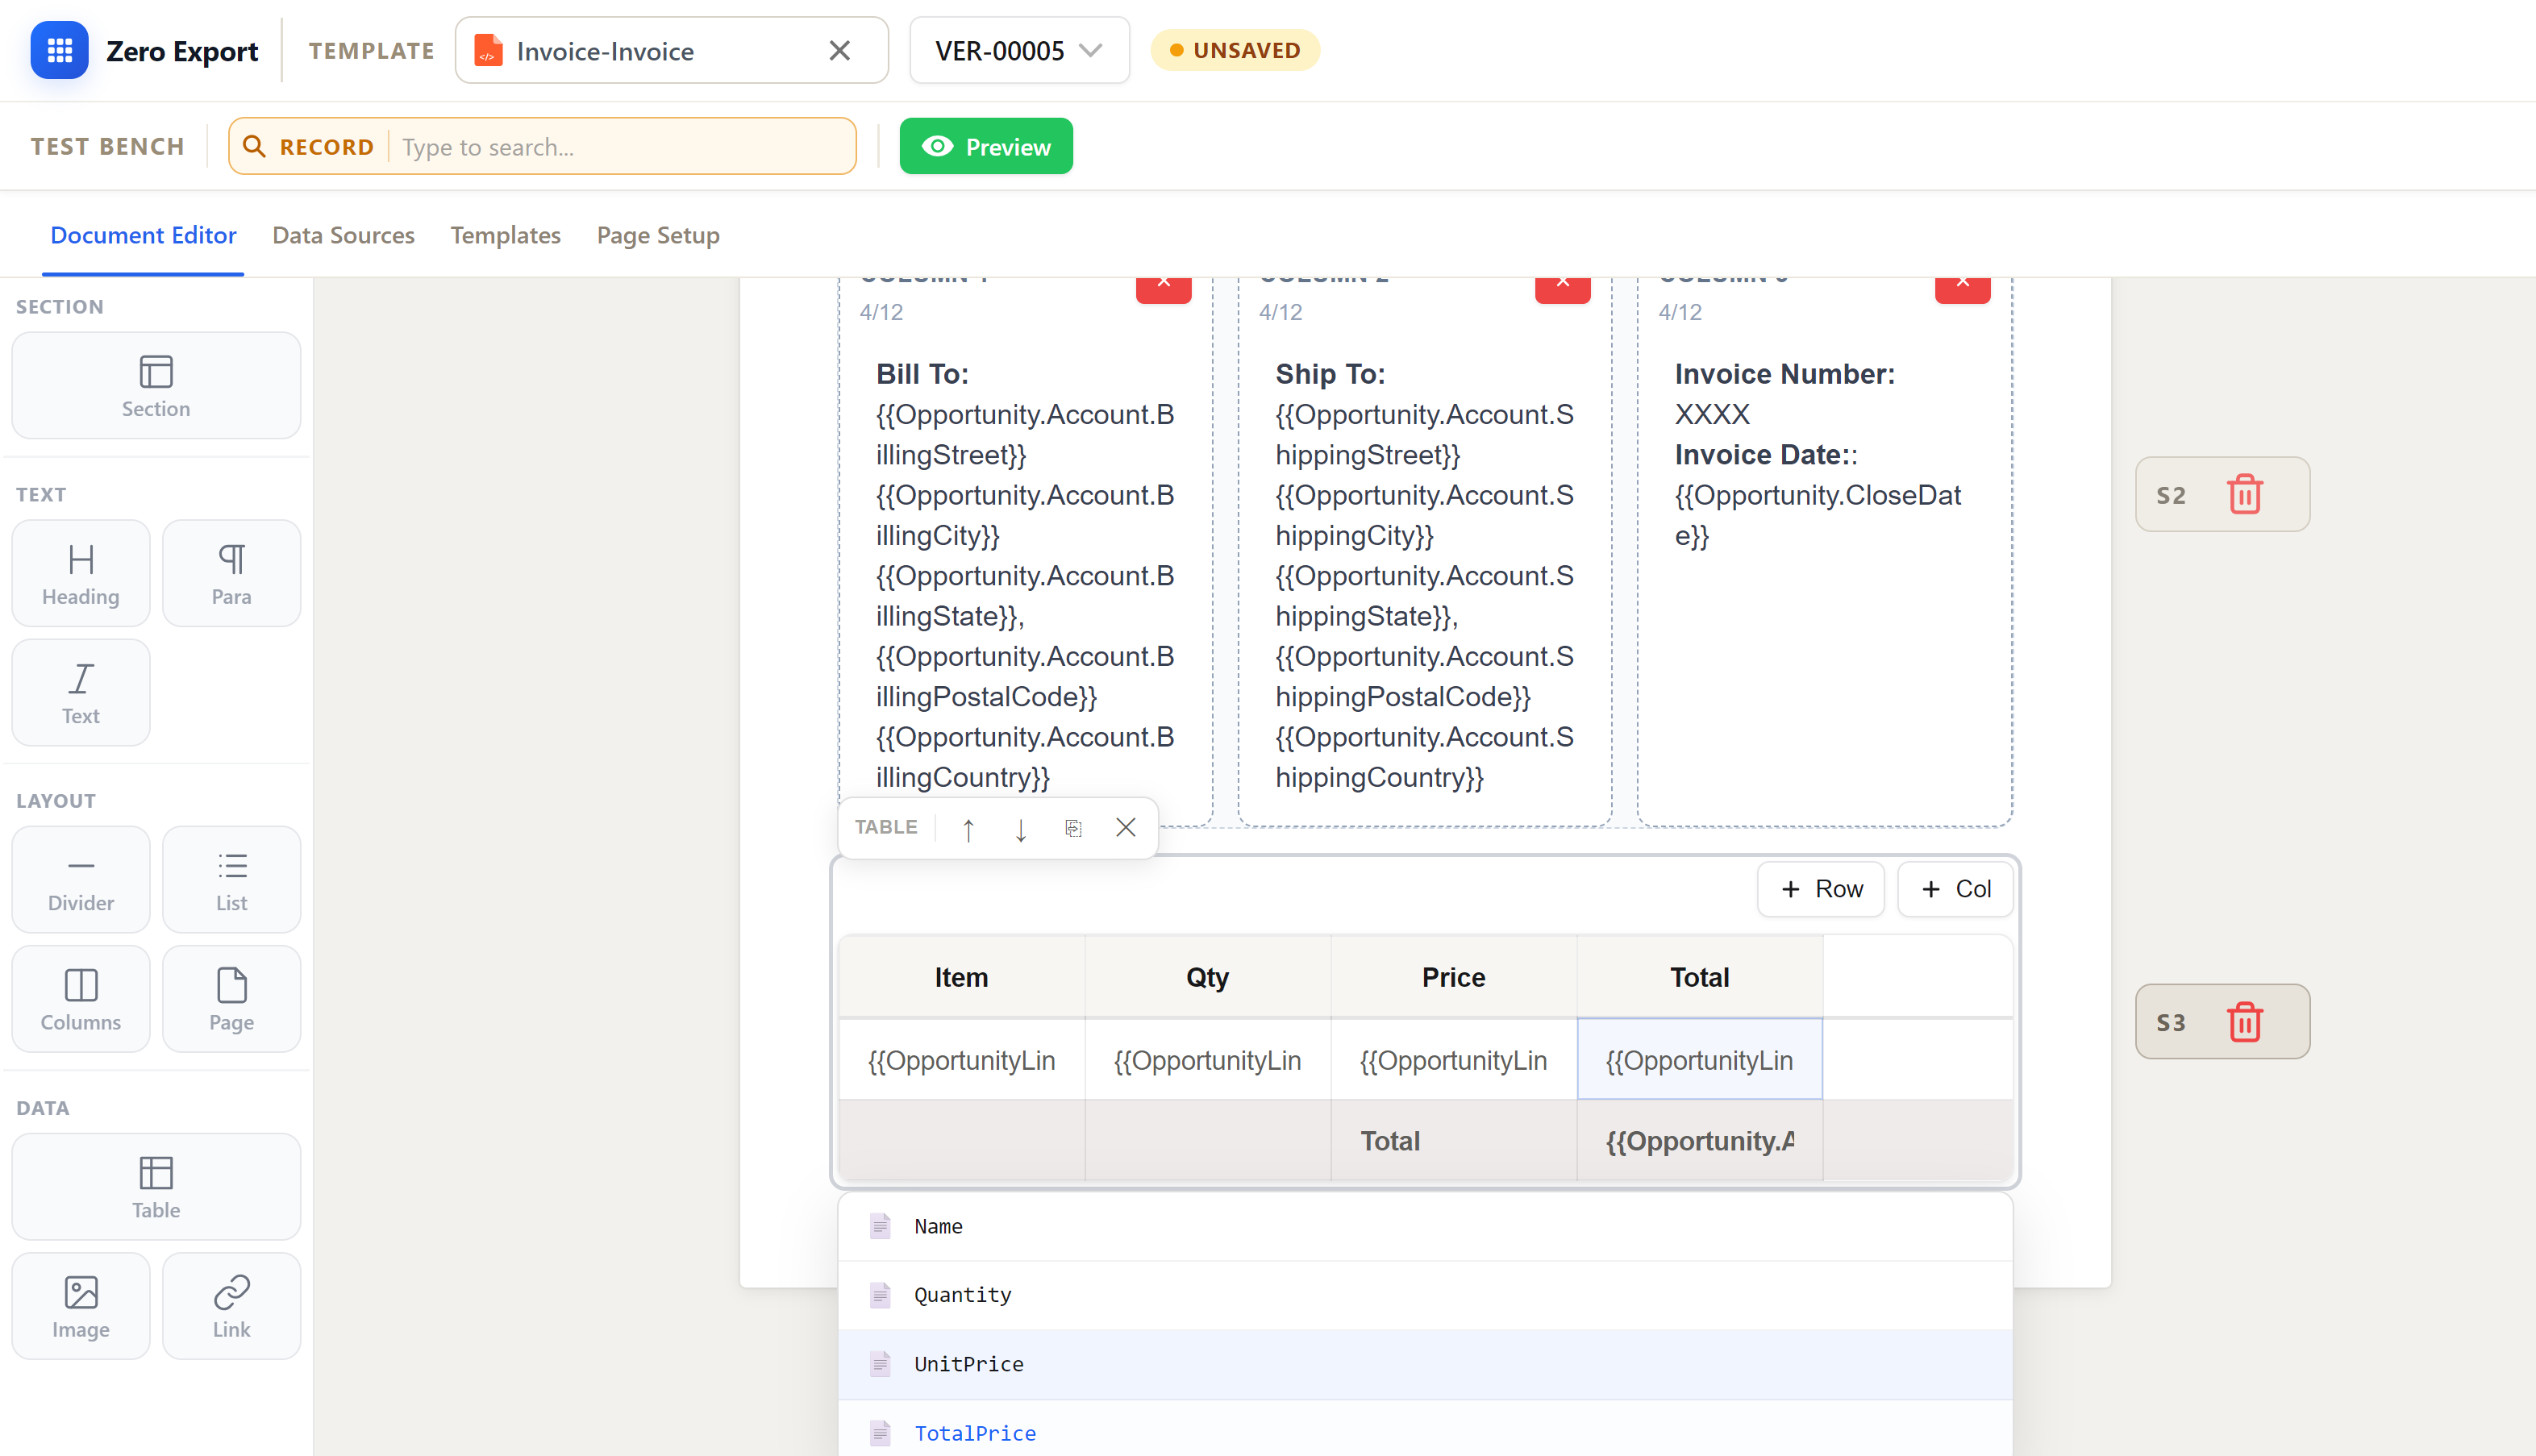
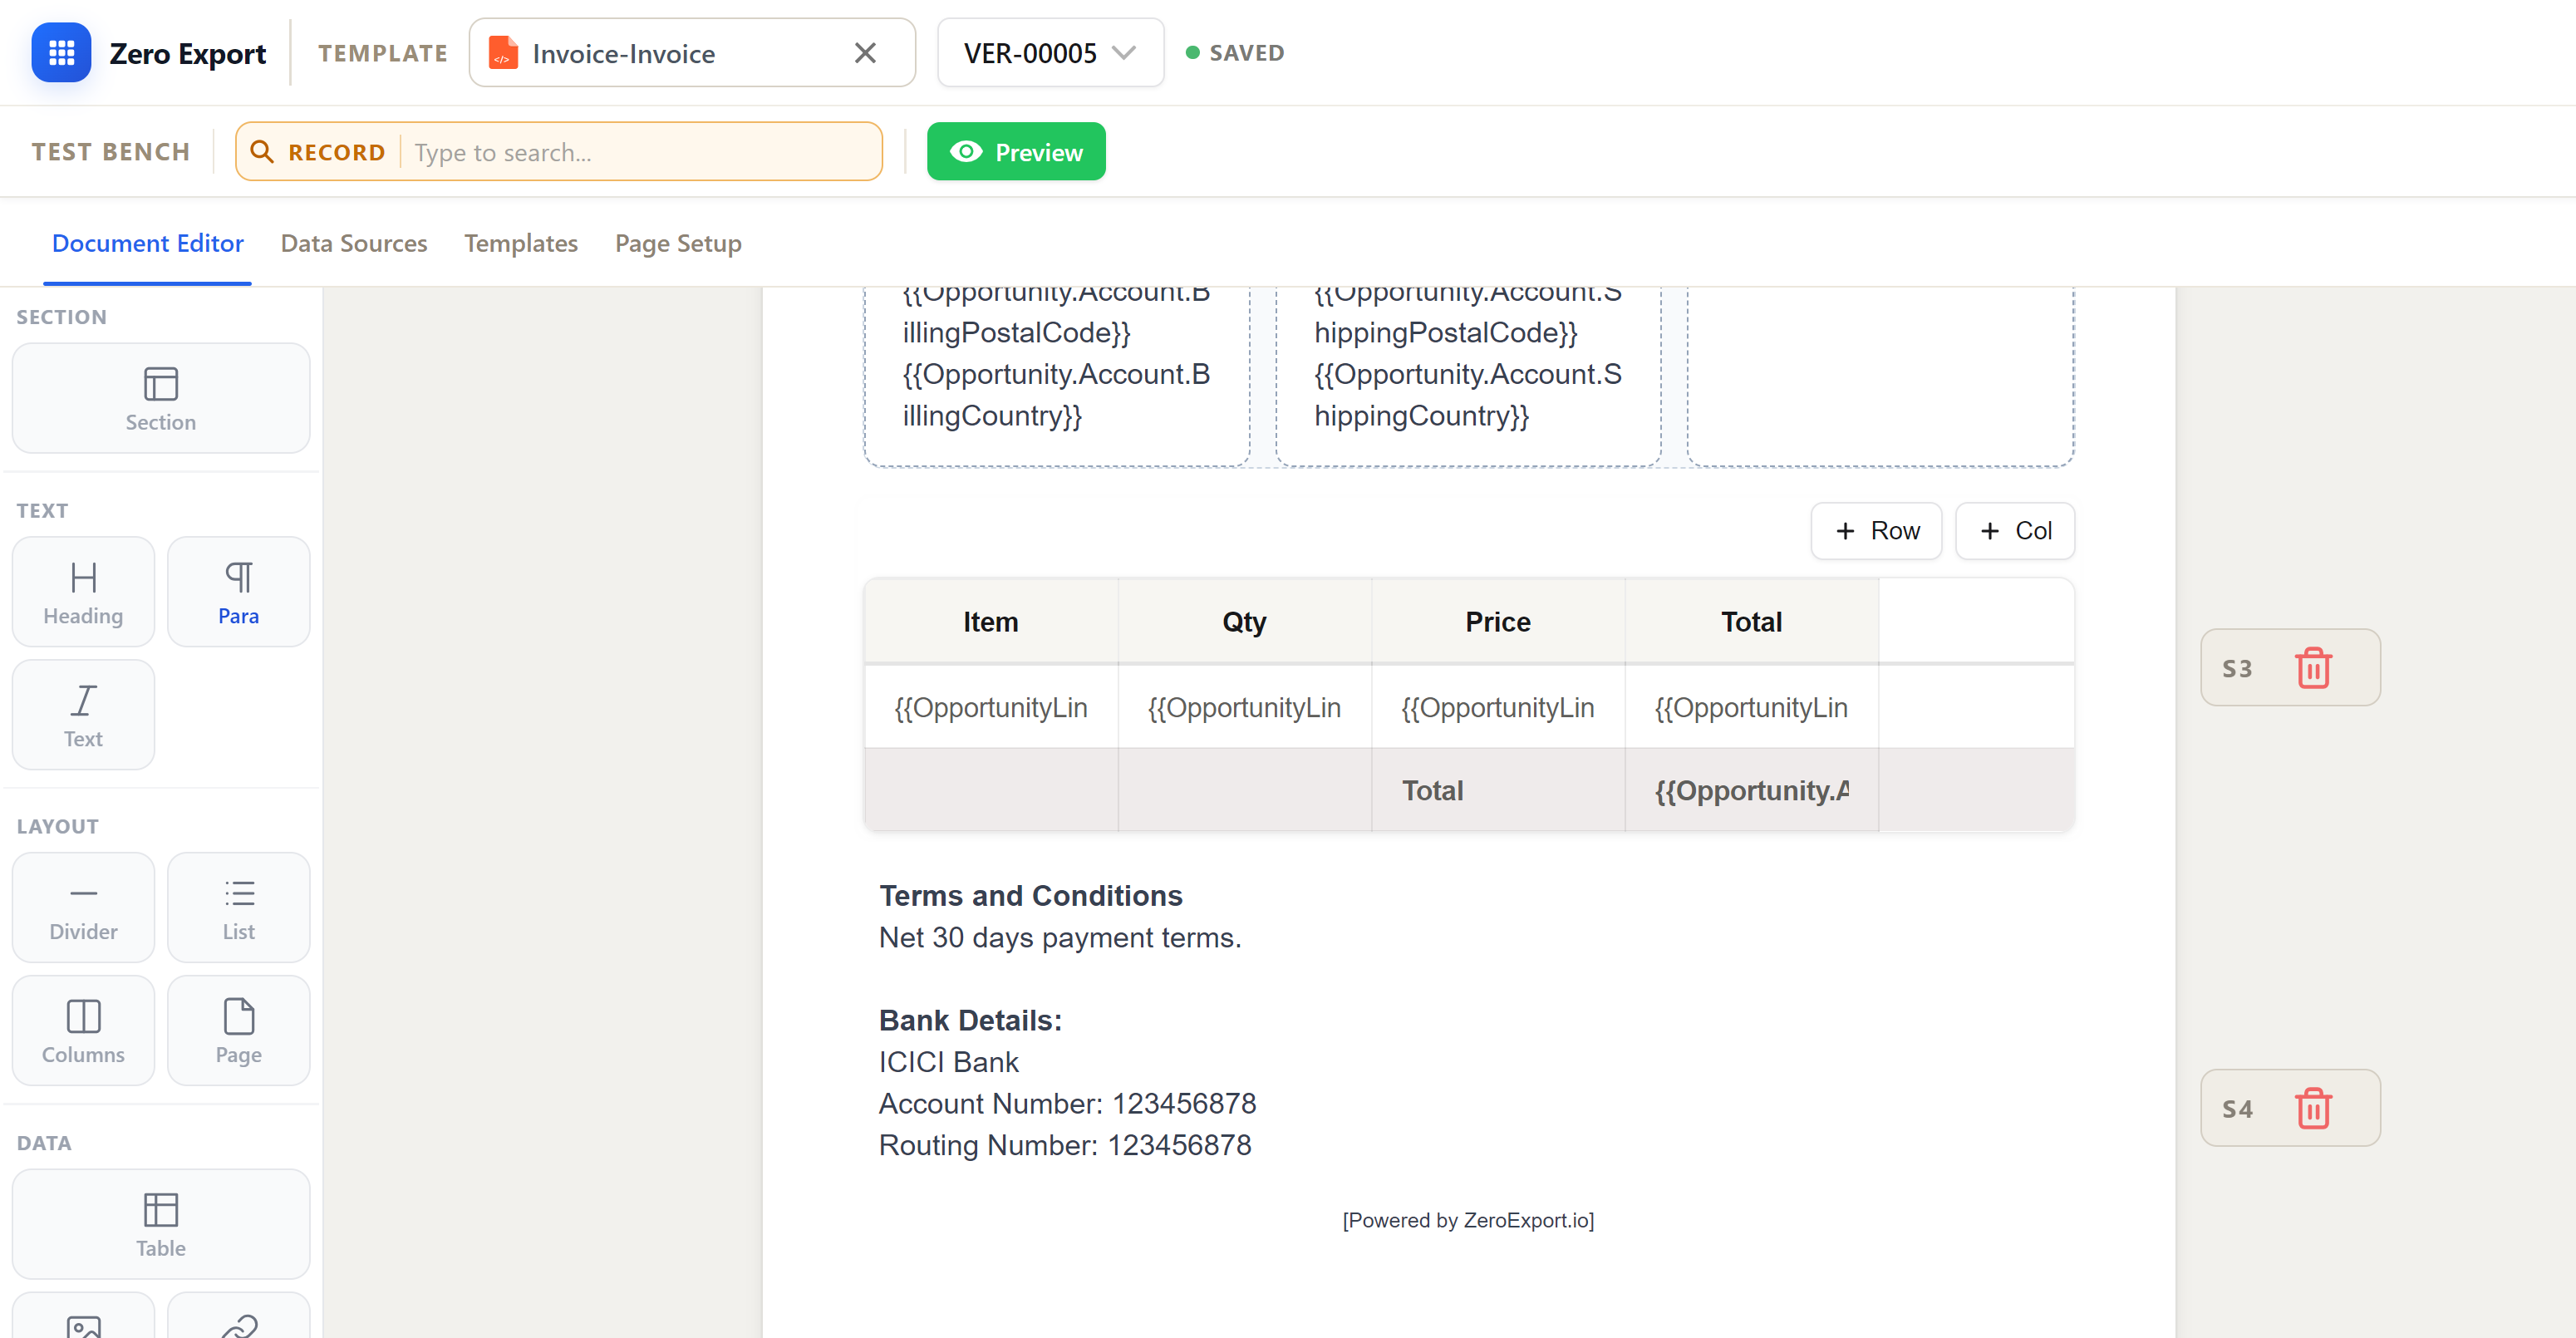
6. Add Dynamic Invoice Line Items
Now add the core invoice table using Opportunity Line Items.
Set up columns for:
- Product/Service Name
- Quantity
- Unit Price
- Line Total
At the end of the table, include the total amount for the entire Opportunity.
7. Add Terms and Payment Notes
Finish with a short Terms & Conditions section and payment terms. This can include static legal text and reusable payment instructions.
8. Preview with Real Salesforce Data
Use the Test Bench to validate output before activation:
- Select a real Opportunity record
- Click Preview
- Confirm merge fields, line items, totals, and logo rendering
This is the fastest way to verify Salesforce document generation output quality before users depend on it.
9. Generate and Automate PDF Invoices
Once preview is correct, activate the template and connect it to your process:
- Generate PDF invoices manually from Salesforce records
- Trigger invoice generation from Salesforce Flow
- Add process-based automation for standard billing cycles
This approach gives you the control of logic-driven documents without Word-template fragility.
Why This Approach Works Better
Branded invoice creation should not require rebuilding templates for every business change. With a structured drag-and-drop layout plus dynamic data mapping, you get:
- Better branding consistency
- Faster updates for finance and operations teams
- Fewer formatting issues at generation time
- Reusable template logic across invoice scenarios
If your team also struggles with brand drift across quotes and invoices, this deeper guide on document branding consistency is a useful companion.
FAQ
Can I generate invoices in Salesforce without Word templates?
Yes. ZeroExport lets you build invoice templates using drag-and-drop sections and merge fields, then generate PDFs natively in Salesforce.
Which Salesforce object can I use for invoice data?
You can use standard or custom objects. In this example, we used Opportunity and Opportunity Line Items, but you can source data from any relevant object.
Can I automate invoice generation?
Yes. After template setup, you can trigger invoice generation through Salesforce Flow or process-based automation.
How do I keep invoice branding consistent?
Use reusable layout blocks for logo, company details, tax info, and terms. This helps standardize invoice output across teams.
Related reading
Ready to try ZeroExport?
Start generating documents directly in your Salesforce org. No integrations, no setup overhead, no complexity.